Upload transactions to Post Office
- vickyp
- Roman Konovalov
Transactions are sent to Post Office on Upload tab. Greenrain Messenger supports all transactions types accepted by each Post Office.
General workflow for transactions uploading looks as follows.
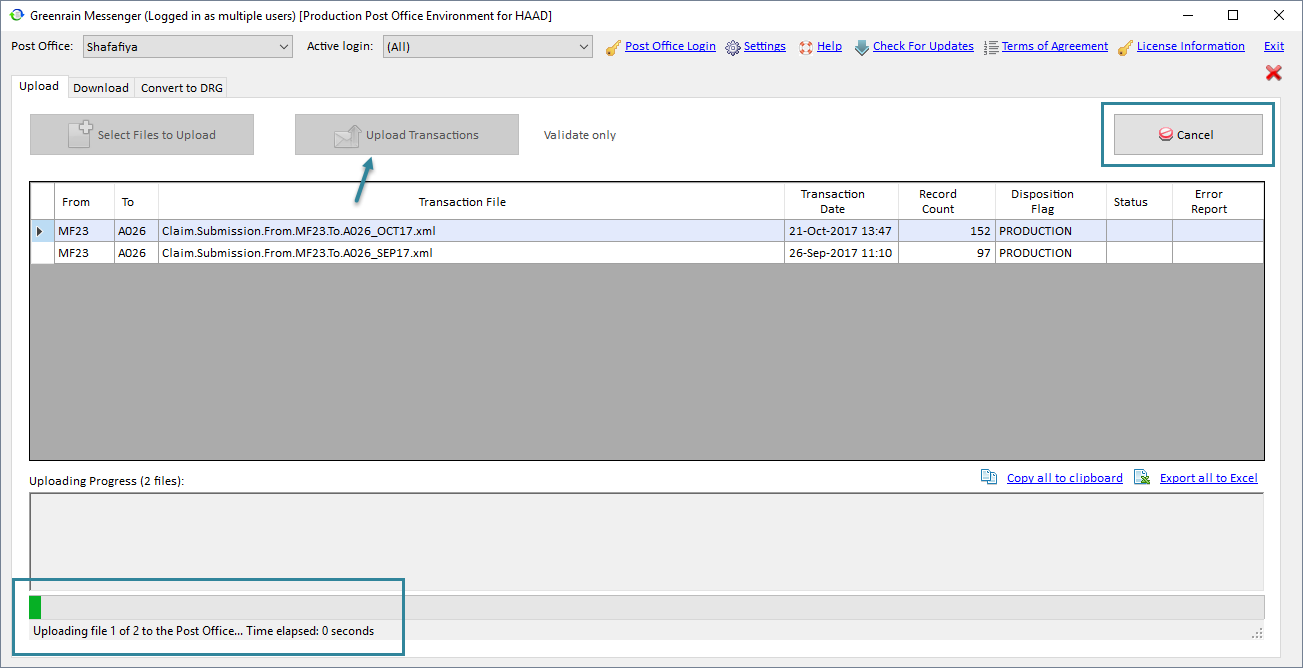
Step 1. Select a transaction file of files with means of Select Files to Upload button or just drag and drop as many files as you need.
Transactions details load to the grid below.

The number of lines corresponds with the number of files selected. Transactions Summary grid shows the following details:
- From – the sender of the transaction (provider, TPA or payer license code);
- To – the receiver of the transaction (provider, TPA or payer license code);
- Transaction File – uploaded file name;
- Transaction Date – date and time of the transaction generation;
- Record Count – the number of claims/prior requests/persons sent within a transaction;
- Disposition Flag – the flag which indicates whether transaction is going to be tested against the validation rules set only or uploaded to the Post Office;
- Status – validation result;
- Error Report – the link to the warnings or errors report.
Status and Error Report cells are empty for just selected file.
The grid allows sorting by any column on click its header.
Step 2. Click Upload Transactions.
The file starts validating against the specific Health Authority rules set. Progress bar at the bottom of the tab shows uploading progress. Besides, Cancel button appears at the top to let you cancel a transaction uploading if it takes a lot of time.
When the process is finished, a dialog appears saying that the file uploading is finished either successfully or not.
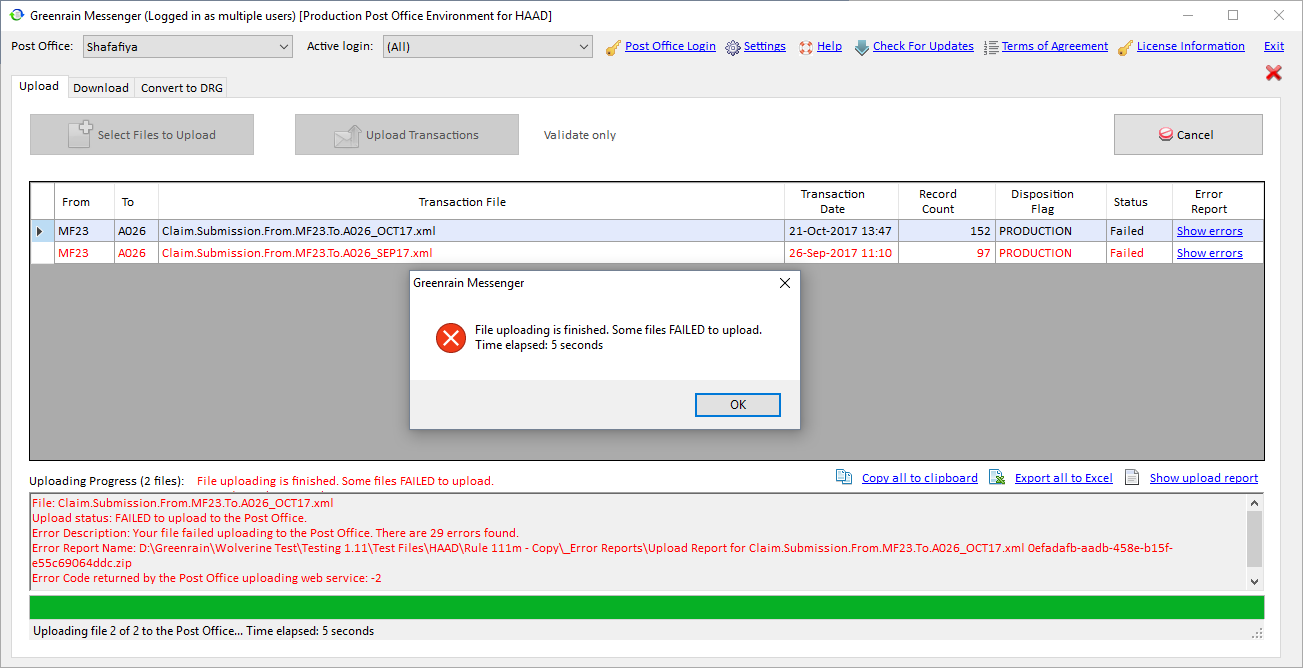
Step 3. Click OK in that dialog.
The dialog closes.
Transactions Summary grid updates:
- If there are no warnings and errors found, the file is considered uploaded to the Post Office:
- Status = Success;
- Error Report = <empty>;
- If there are only warnings found, the file is also considered uploaded to the Post Office as it doesn’t contain errors:
- Status = Success with warnings;
- Error Report = Show warnings link;
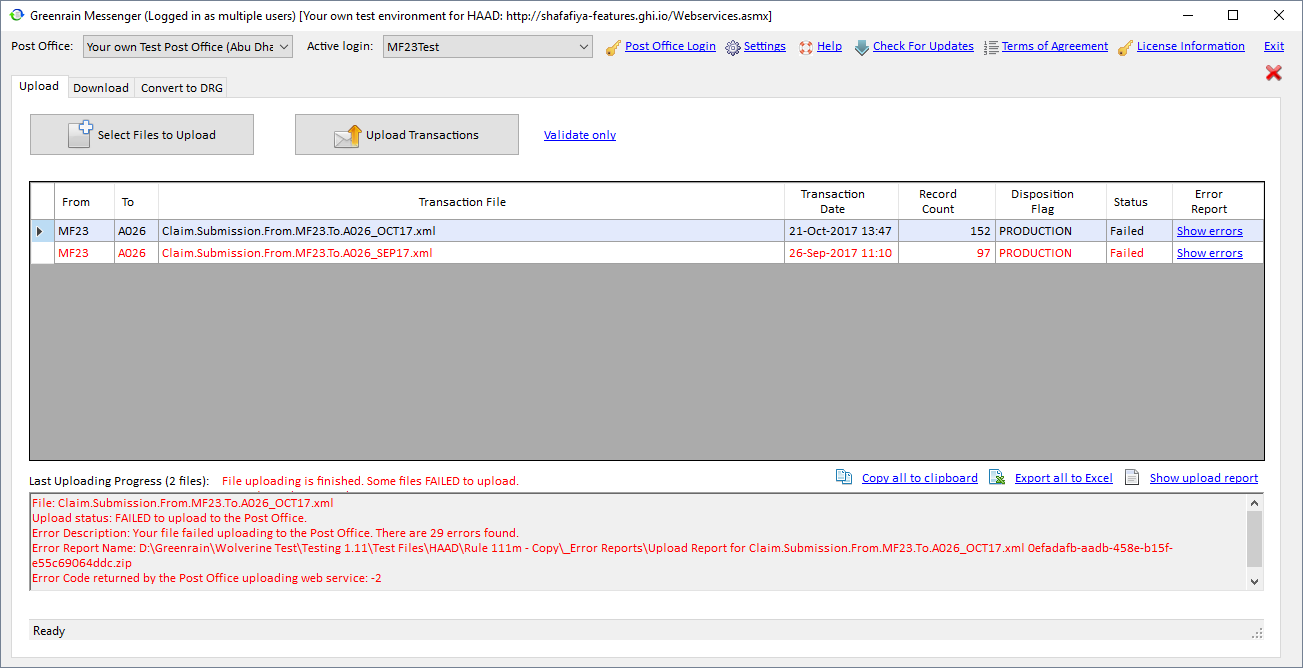
- If there are only errors or both warnings and errors found, the file is discarded:
- Status = Failed;
- Error Report = Show errors link;
There is also Show upload report link appeared under the grid at the left.
Status panel below the grid shows Last Uploading Progress with the following details:
- File – the file name (same as in Transactions Summary grid);
- Upload Status – possible values are:
- Successfully uploaded to the Post Office if Status = Success or Success with warnings;
- Failed to upload to the Post Office if Status = Failed;
- Error Description – contains found warnings or (and) errors count;
- Error Report Name – the full path to the errors report file;
- Error Code returned by the Post Office uploading web service.
If several files have been selected, the files are validated one by one. Status panel shows data for the line currently highlighted in the grid (that is the first line by default). On changing focus to another line, Status panel data refreshes.
Step 4. To review warnings / errors, click:
- Show warnings / Show errors in Error Report column;
- Show upload report under the grid.
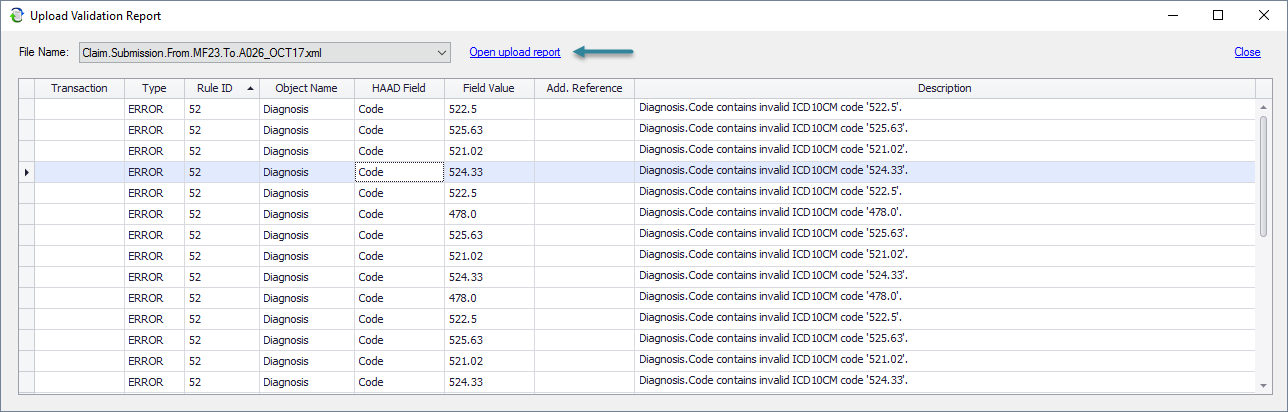
In both cases Upload Validation Report dialog appears.
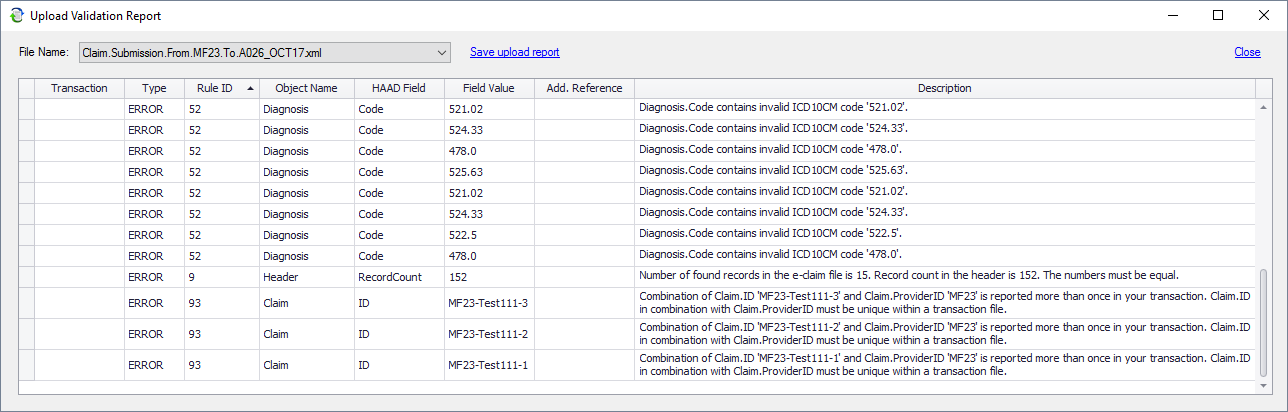
At the top, it shows a list of transactions for which validation was not successful. The file for which report is opened is pre-selected by default. The grid below shows validation result details:
- Transaction – transaction type, e.g. Claim.Submission, Remittance.Advice;
- Type – WARNING or ERROR;
- Rule ID – the Health Authority rule raised this warning or error;
- Object Name – the object where this warning or error is located;
- Field – exact field with warning or error;
- Add. Reference – additional reference to the main object (for example, to a claim / prior request by their ID);
- Description – a warning or error message returned by the validation engine.
Note: If the dialog opens by click on Show upload report, then All files is selected by default, and consolidated errors report is loaded to the grid.
The grid allows sorting by any column on click its header and filtering by Transaction, Type, Rule ID, Object Name, HAAD Field.
Step 5. Click Save upload report. Save as… dialog appears.
Step 6. Select where to store the report.
The report is saved. After that, Open upload report becomes available, and you can open the file stored locally.
Transaction Summary grid data can be also copied to clipboard or exported to Excel (Copy all to clipboard and Export all to Excel options below the grid).