Convert to Excel
- vickyp
Conversion to Excel is one of the two main workflows of Greenrain Submission. The feature allows to transform one or several transactions to table view in xlsx format. In other words, this is a reverse or backward conversion: the output file of this operation is an input file for conversion on tab Generate Transactions.
The workflow is as follows.
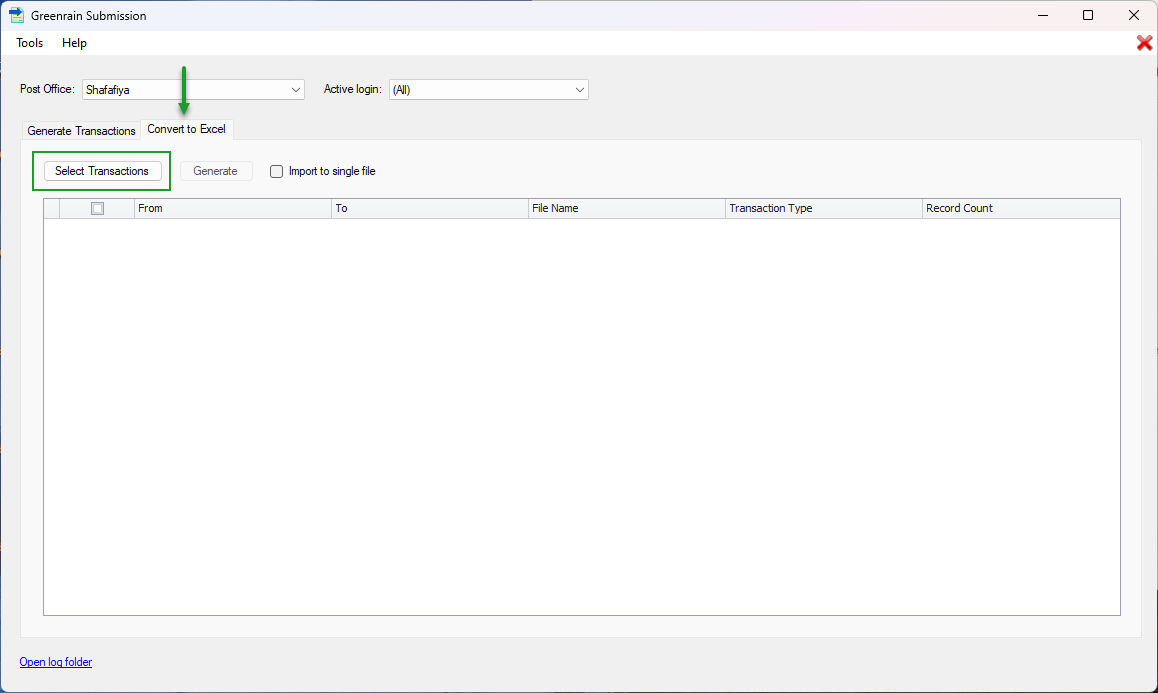
Step 1. Click tab Convert to Excel.
Step 2. Click Select Transactions.
A standard Windows Select dialog opens.
Step 3. Choose the necessary transactions for conversion. The following transaction types and formats are supported:
Shafafiya (DOH)
Transactions
Claim.Submission
- Remittance.Advice
- Person.Register
Format
- xml
- zip (archived xml)
DHPO
Transactions
Claim.Submission
- Remittance.Advice
- Member.Register
Format
- xml
- zip (archived xml)
Riayati PO
Transactions
Claim.Submission
- Claim.Remittance
Format
- json
All transactions chosen on the previous step are selected by default. User can select only those files that they finally decide to process. If a transaction is an archive (zip file), the grid shows the xml file itself.
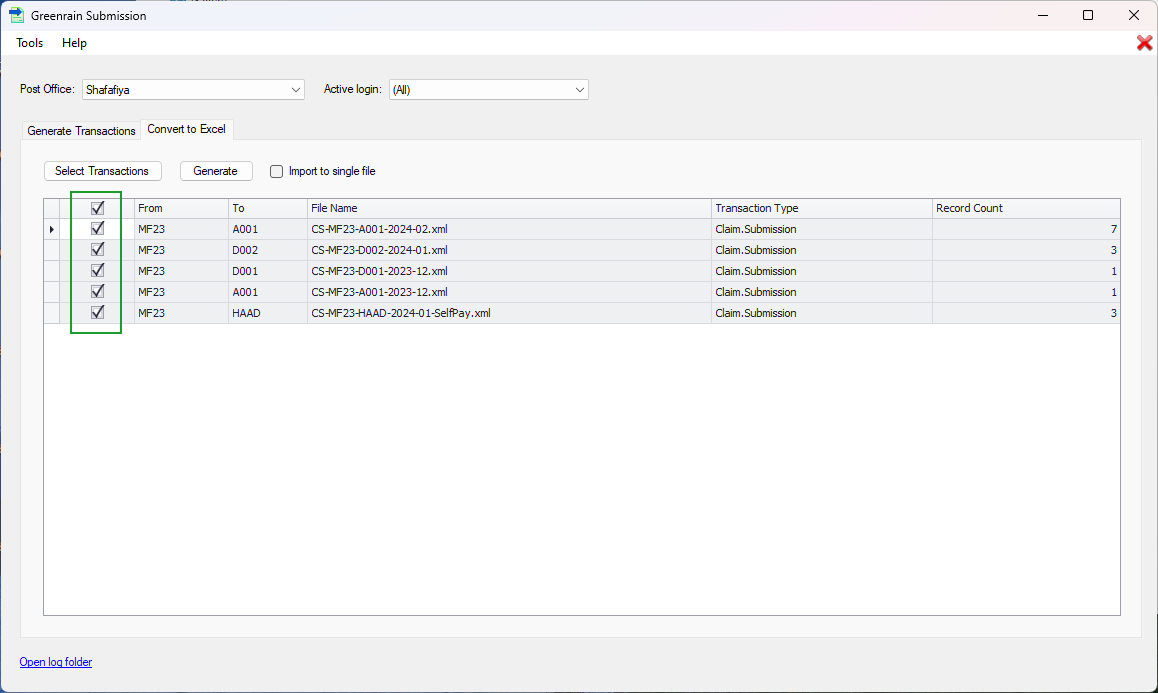
Step 4. Choose checkbox Import to single file if necessary.

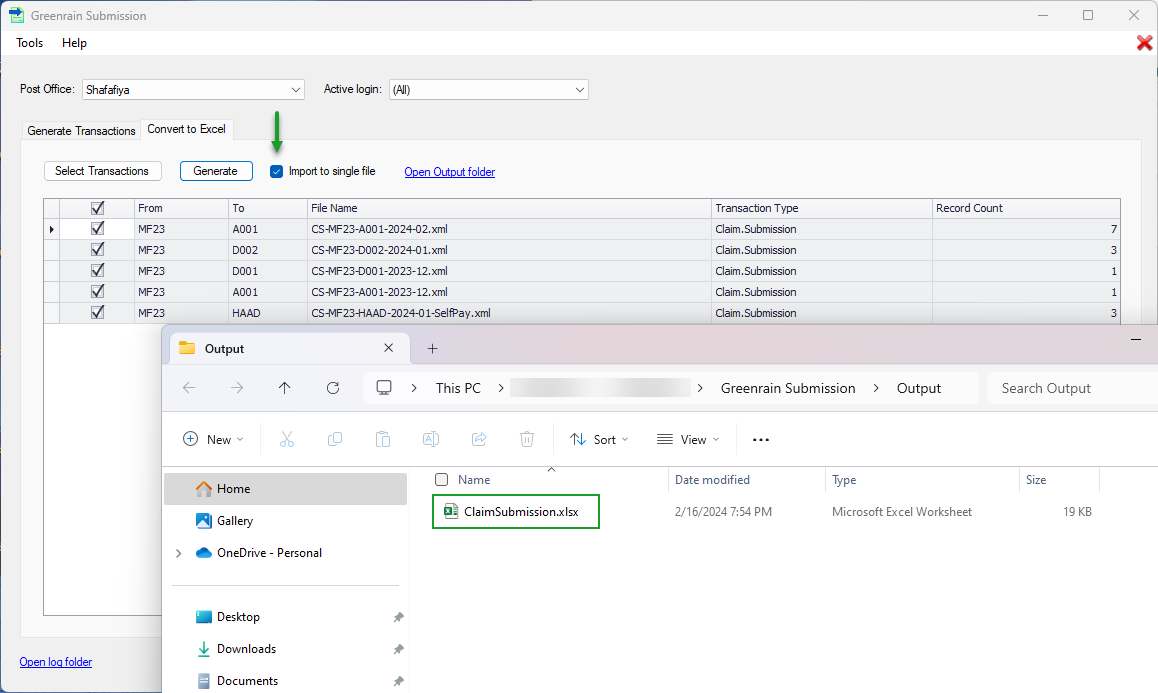
- When Import to single file is checked, data from transactions of the same type is grouped into one Excel file. It means the output is a single file (Claim.Submission.xlsx, Remittance.Advice.xlsx, Person.Register.xlsx, etc.).
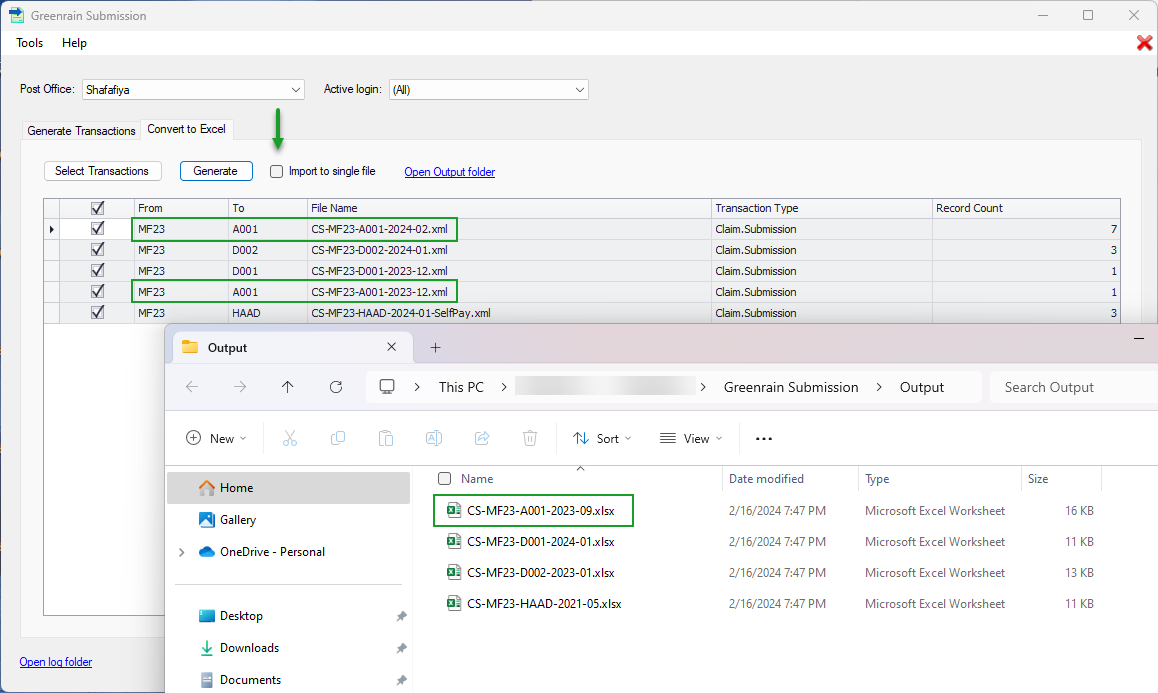
- When Import to single file is unchecked, data from transactions of the same type is grouped by common rules where combination Sender ID + Receiver ID is unique (see columns From + To). It means the number of the output files may be the same as or less than the number of the input transactions.
Step 5. Click Generate.
Greenrain Submission validates provided data, then generates Excel files. A success dialog appears. The success dialog, as well as the main form, shows the link to the output folder.

Step 6. Click Open Output folder in the success dialog or from the main view.
The folder with the generated file(s) opens. Each output file is in the xlsx format. Examples below show how the output result differs depending on the setting.
a) When Import to single file is checked. All transactions have the same Transaction Type = Claim.Submission, therefore, only one combined file is generated:
b) When Import to single file is unchecked. All transactions have the same Transaction Type = Claim.Submission, and two transactions are grouped into one Excel file since they have the same values in columns From + To columns; the rest of the transactions have nothing in common and are generated separately.
Note
- If you want to do several conversions to Excel, make sure you have saved already generated files into another location or they will be lost: Output folder overwrites on each attempt.
- Make sure there are no duplicated records in different input transactions by Claim.ID, Member.ID since only the first encounter will be taken for processing.